2024年4月17日 星期三

虛擬機安裝LINUX後出現blk_update_request: I/O error, dev fd0, sector 0...

 問題背景:

行命令netplan apply用配置的ip報錯: blk_update_request: I/O

 error, dev fd0, sector 0


問題分析:

報這個錯,是因 linux了 floppy 軟碟驅動,我的虛機沒軟碟

統啟動時軟碟驅動


方法:

過關閉軟碟塊來


# sudo lsmod | grep -i floppy

# sudo rmmod floppy

# echo "blacklist floppy" | sudo tee /etc/modprobe.d/blacklist-floppy.conf

sudo dpkg-reconfigure initramfs-tools 或 sudo update-initramfs -u -k all

# reboot


確認floppy塊沒用即可。

# lsmod | grep -i floppy


2024年4月11日 星期四

docker 安裝windows系列

在ubuntu 建置docker及compose

安裝KVM

sudo apt install cpu-checker -y

執行 sudo kvm-ok 

順利的話出現

INFO: /dev/kvm exists
KVM acceleration can be used

 1.下載windows鏡像

docker pull dockurr/windows

也可以選擇本地構建:

git clone https://github.com/dockur/windows.git

cd windows

docker build -t dockurr/windows .

2.建立docker-compose.yml

#version: "3" --目前新版本已不適用
services:
  windows:
    image: dockurr/windows
    container_name: windows
    privileged: true
    environment:
      VERSION: "win11"
      BOOT_MODE: "windows_plain"
    devices:
      - /dev/kvm
    cap_add:
      - NET_ADMIN
    ports:
      - 8006:8006
      - 3389:3389/tcp
      - 3389:3389/udp
    stop_grace_period: 2m
    restart: on-failure
    network_mode: bridge
3.執行docker compose up
4.用瀏覽器連 docker主機IP:8006
ValueDescriptionSourceTransferSize
win11Windows 11 ProMicrosoftFast6.4 GB
win10Windows 10 ProMicrosoftFast5.8 GB
ltsc10Windows 10 LTSCMicrosoftFast4.6 GB
win81Windows 8.1 ProMicrosoftFast4.2 GB
win7Windows 7 SP1Bob PonyMedium3.0 GB
vistaWindows Vista SP2Bob PonyMedium3.6 GB
winxpWindows XP SP3Bob PonyMedium0.6 GB
2022Windows Server 2022MicrosoftFast4.7 GB
2019Windows Server 2019MicrosoftFast5.3 GB
2016Windows Server 2016MicrosoftFast6.5 GB
2012Windows Server 2012 R2MicrosoftFast4.3 GB
2008Windows Server 2008 R2MicrosoftFast3.0 GB
core11Tiny 11 CoreArchive.orgSlow2.1 GB
tiny11Tiny 11Archive.orgSlow3.8 GB
tiny10Tiny 10Archive.orgSlow3.6 GB

參考:https://github.com/dockur/windows
https://soulteary.com/2024/03/11/install-windows-into-a-docker-container.html#%E5%86%99%E5%9C%A8%E5%89%8D%E9%9D%A2


2024年4月3日 星期三

proxmox 出現 an't lock file '/var/lock/qemu-server/lock-107.conf' - got timeout

 1.進入 cd /var/lock/qemu-server

2.將要關閉的guest的conf刪除,例如: rm -rf lock-107.conf

3.停止guest, 例如: qm stop 107

2024年3月28日 星期四

proxmox 遷移時出現migration status error: failed - Unable to write to socket: Broken pipe

 進入每個節點的主控台

nano /etc/ssh/sshd_config

將AllowTcpForwarding yes前的#刪除存檔

systemctl restart sshd

參考:https://xtonousou.com/proxmox-ve-live-migration-issue/

2024年3月21日 星期四

proxmox 無法將guest關機出現can't lock file '/var/lock/qemu-server/lock-101.conf' - got timeout

 進入PVE的主控台,到為VM則路徑為/var/lock/qemu-server/ 去ls看101的lock,然後下rm -rf lock-101.conf,之後在下qm stop 101

如果是是CT,故路徑為/var/lock/lxc/ 然後下rm -rf pve-config-195.lock


參考:https://medium.com/@kui43888/proxmox-%E4%BF%AE%E5%BE%A9%E7%84%A1%E6%B3%95%E9%97%9C%E6%A9%9F-%E5%81%9C%E6%AD%A2vm-ct-b9a30da8c0b6

Proxmox VE 解決登入出現『目前沒有技術支持合約』


方法1:讓他不要檢查是否有買Enterprise合約

修改檔案/usr/share/javascript/proxmox-widget-toolkit/proxmoxlib.js

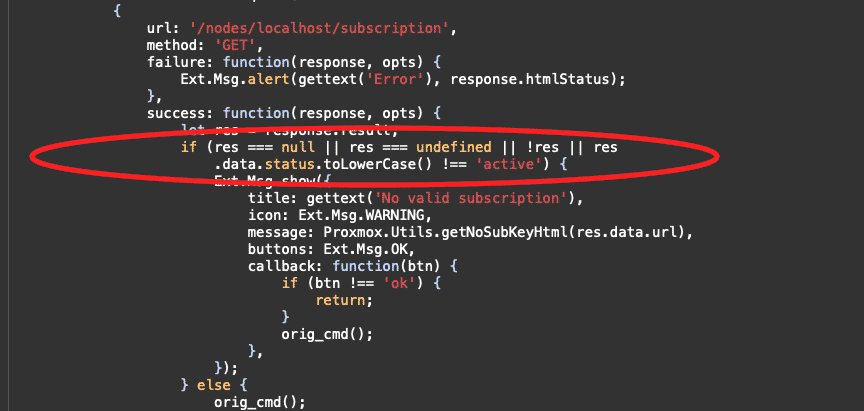
打開之後尋找

if (res === null || res === undefined || !res || res
    .data.status.toLowerCase() !== 'active') {

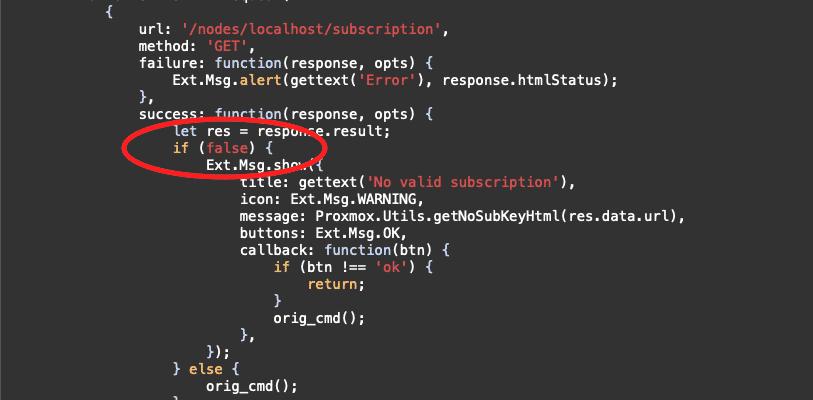
將此段修改為

if (false) {

修改完之後重啟服務

systemctl restart pveproxy

============================================================

方法2:不要讓他跳出視窗

不要讓它顯示相對簡單

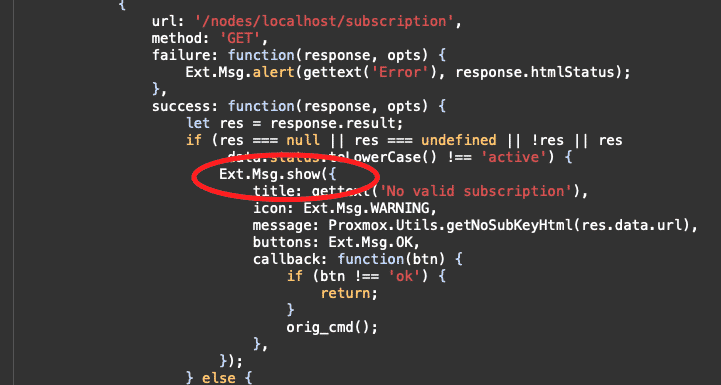
再方法1同一檔案中尋找到

 Ext.Msg.show({

這邊要注意的是他的位置是在方法1的指令碼下方這個

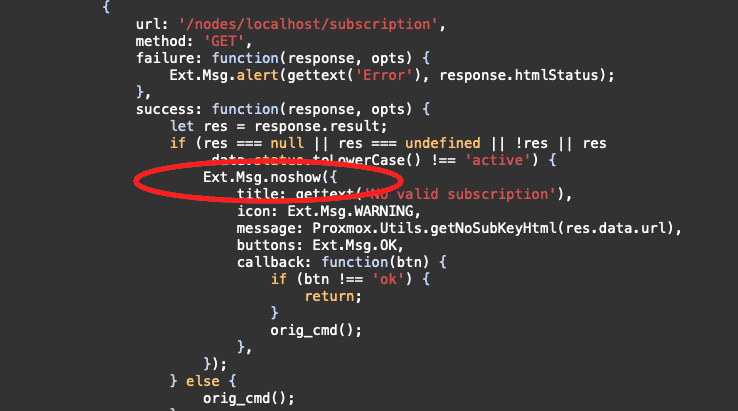
將它修改為

 Ext.Msg.noshow({

修改完之後重啟服務

systemctl restart pveproxy

比較方法一二的方式來說並無優劣之分,但就方式來說建議使用第二種讓他暫時停止顯示,在未來要回復設定也是比較快的。

建議用方法二比較簡單。

參考:https://www.albert-yu.com/blog/proxmox-ve-%E8%A7%A3%E6%B1%BA%E7%99%BB%E5%85%A5%E5%87%BA%E7%8F%BE%E3%80%8E%E7%9B%AE%E5%89%8D%E6%B2%92%E6%9C%89%E6%8A%80%E8%A1%93%E6%94%AF%E6%8C%81%E5%90%88%E7%B4%84%E3%80%8F/

2024年3月19日 星期二

proxmox 安裝到 trying to detect country...

 proxmox 安裝到 trying to detect country...會很久

Ctrl-Alt+F3切換到

root@proxmox:/# geoiplookup 168.95.1.1

出現GeoIP Country Edition:TW,Taiwan

root@proxmox:/# proxmox-low-level-installer dump-env

關機重起